How to Upload Listingpro Theme to Wordpress
ListingPro Guide
Version two.0
This ListingPro documentation covers the basic steps to get setup. For more than details please refer to our Cognition Base of operations.
This guide will introduce some important steps to successfully piece of work with ListingPro Directory.
All the upcoming sections volition give you details on how to setup ListingPro and some of the main features available, giving a step by step guide to agreement the structure and how things work underneath the core system of this Directory.
1. Facebook Customs: Access the page
This community was created to unite our users in the post-obit development of their projects. You tin get help from others and yet contribute with the knowledge you have while discussing ideas that may be implemented strategies into your Directory. Besides, in that location'due south a high take chances of making partnerships with users worldwide.
two. Documentation Center: Access the page
We've also a knowledge base with relevant articles on how to work with ListingPro Features and its settings. These manufactures past time to time are updated when in that location's a new feature available. The knowledge base of operations is a skilful learning material for first comers and may solve of import doubts during your evolution.
iii. Back up Aqueduct: Access the page
This is our official support channel, where you may make it contact with our squad in order to become technical help when needed. Keep in mind that our support channel is also a place to share details of any issue or bug that you lot may find during your progress with ListingPro. Before you open up a ticket on our support aqueduct, we'd invite yous to access the 2 channels above first.
Before we get to the installation and settings, permit'due south get into details on how to Download ListingPro from your ThemeForest Account and explicate some of the files that y'all'll run into in the bundle.
To Download ListingPro, cheque the following steps below:
- Log in with your ThemeForest business relationship.
- Motion hover your account details and click on Downloads.
- Notice the ListingPro on your purchased list.
- Click on the Download Button.
- Choose on the list the "All Files & Documentation".
- Also, Download the "License Certificate & Buy Code" (PDF or Text).
After downloading the existing files from your ThemeForest account, information technology's important to unzip the archive on your reckoner. After unzipping the annal, there are iii of import files that you'll notice:
- ListingPro.nothing
- Child Theme.zip
- Live Demo Content.zip
ListingPro.zip – This is the file that you'll upload in guild to install the ListingPro Directory.
Kid Theme.zip – This is the file that keeps all of your customizations intact after some updates.
Alive Demo Content.cypher – This is the file that contains a listing of content as a demonstrative example.
Don't forget to keep your buy lawmaking in a prophylactic folder on your computer
We highly recommend verifying the following on your host. If you don't accept access to check or modify these details, delight contact your hosting company.
- Running latest WordPress version (case: iv.v or higher)
- PHP Version: Minimum: five.vi | Recommended: 7.0
- MySQL 5.six or higher
Recommended PHP Configuration Limits
Many bug that you may run into such as; white screen, demo content fails when importing, empty folio content and other similar problems are all related to low PHP configuration limits. The solution is to increase the PHP limits. You tin can practice this on your own, or contact your web host and ask them to increase those limits to a minimum as follows:
- max_execution_time300
- memory_limit512M
- post_max_size100M
- upload_max_filesize120M
NOTE: The above may vary and will need to be adjusted according to the site load of the user in case the site is non performance every bit expected. You may also contact your hosting to go advice.
Choice 1:Quick & Piece of cake Process
Installing the theme from WordPress Admin Console
- From the left-side carte, go toAppearance > Themes.
- From the top, clickAdd New, so click theUpload Theme.
- ClickCull File, and locate the theme filelistingpro.zip, that you downloaded above from ThemeForest.
You lot must unzip the original zip file and upload simply thelistingpro.zip, or else theme installation volition neglect with following error "The bundle could not be installed. The theme is missing the mode.css stylesheet".
- ClickInstall Now.
- Go to Appearance > Themes and clickActivateand this will actuate the newly installed theme and initiate the Easy Setup Wizard to walk you through the initial setup.
Choice 2: Transmission & Advance Process
Installing the theme from FTP
- Log into your hosting space via an FTP software.
- Unzip the listingpro.cipher file and ONLY use the extracted theme folder.
- Upload the extracted xshop theme binder into wp-content > themes folder.
- Actuate the newly installed theme by going to Appearance > Themes and clicking the Activate button
Congratulations!Now you lot have completed Theme Installation
Here is where you find all the relevant details most ListingPro settings. Nearly of the time you'll be editing preferences within the Theme Options.
Each section is represented by its specific functionality. And so, there are no worries to become lost in the list of settings. You'll be able to notice the details in a very organized construction.
It's of import to note that every change that yous decide to apply, should be saved earlier refreshing your projection's folio.
Also, if you've configured everything, you lot tin can just salve a copy of your work every bit a backup.
Below at that place's a quick example of what Theme Options looks similar:
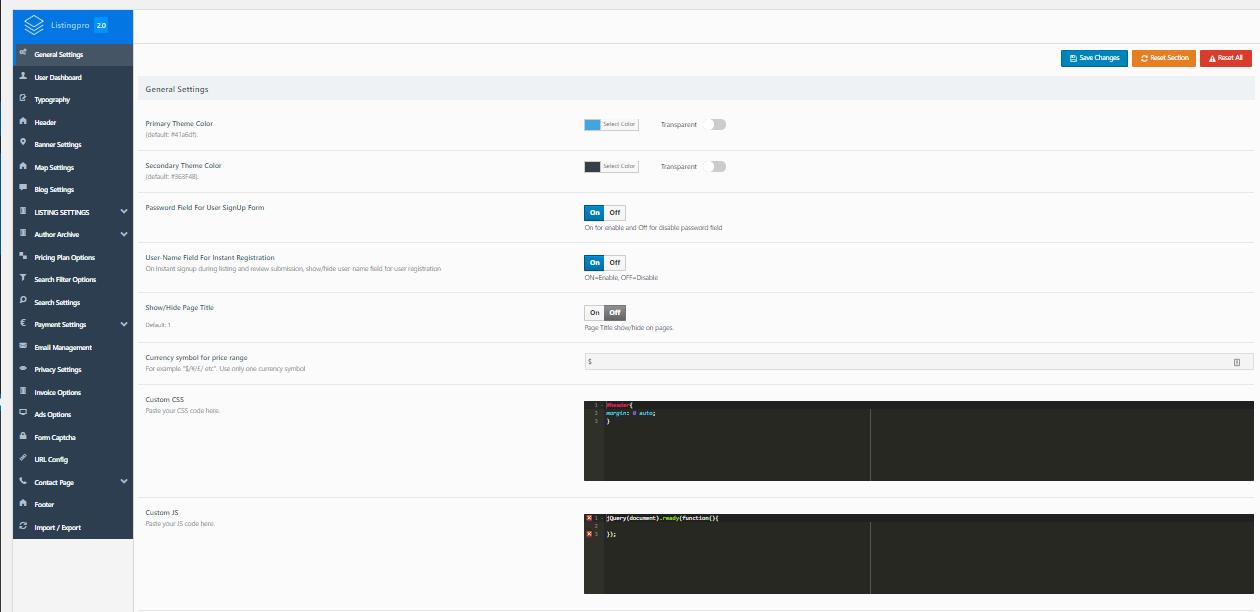
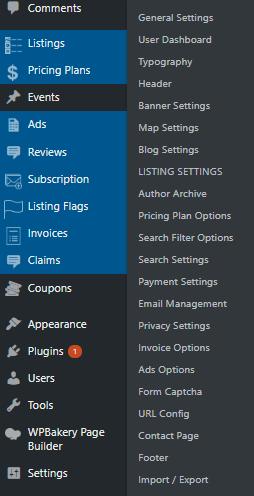
Every section you can find important details about ListingPro settings. As y'all can see, options regarding Listings, Ads, Events, Privacy, Payments and others are available in this department.
To know how to navigate and find theme option on your WordPress Dashboard, you lot tin follow the steps below:
STEP 1: Go to your WordPress Dashboard
Pace 2: Roll down the folio
Footstep 3: Search for Theme Options
Pace 4: Select General or a specific category that you want to configure
Before nosotros dive into creating our categories, configuring the locations and adding some business listings, it'southward important to note that ListingPro has created some standard pages.
These pages should be added in the URL Config located in the Theme Options.
To add these pages, you can follow the steps beneath:
- Get to your WordPress Dashboard.
- Go to All Pages.
- Click on the pages created by ListingPro.
- Re-create the page URL.
- Add together the URL in the URL Config on Theme Options.
Permit's start by creating our kickoff category.
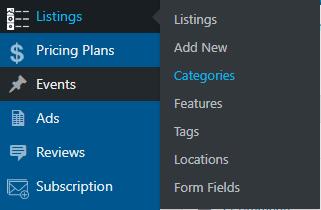
STEP i: Search on your WordPress the section Listings
STEP 2: In the list within this department, select the Categories
STEP 3: Insert a name for the Category
At present that we accept our beginning new category, let'due south include an Icon to be easily identifiable by users.
Step iv: Y'all can insert an Icon by just uploading the image or past copying the base64 lawmaking from Icons8 website.
STEP 5: To generate the lawmaking, chose the image and click on Generate HTML.
STEP 6: Re-create the code after src=
STEP 7: Click on the update button to relieve the settings.
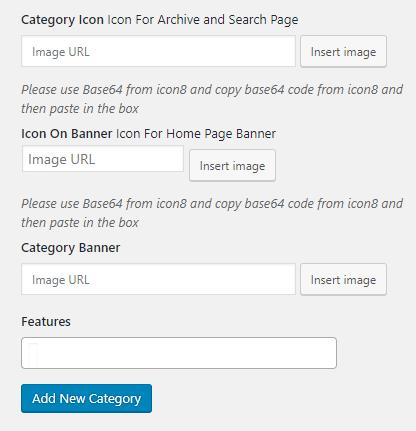
Y'all still have more options to include images such as banners on categories. Y'all tin can opt-in as your preference.
Now, you tin run across the event of the Category with Icon included below:
![]()
At present you can easily add more categories into your Directory.
Features are an important office of a Directory. Adding features into Categories allows you to specify exclusive components that may exist only for that Category or a set of pre-divers features that can exist practical by multiple Categories.
Y'all should sympathise the Category start earlier including a Feature. In this instance, let'south utilize the Gym Category created before to guide usa as a reference.
To starting time adding Features, bank check the below steps:
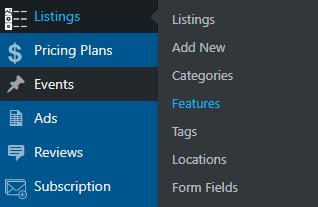
STEP i: Go to Listings
Footstep 2: In the listing, select Features
Now, allow's start adding some Features for the Gym Category
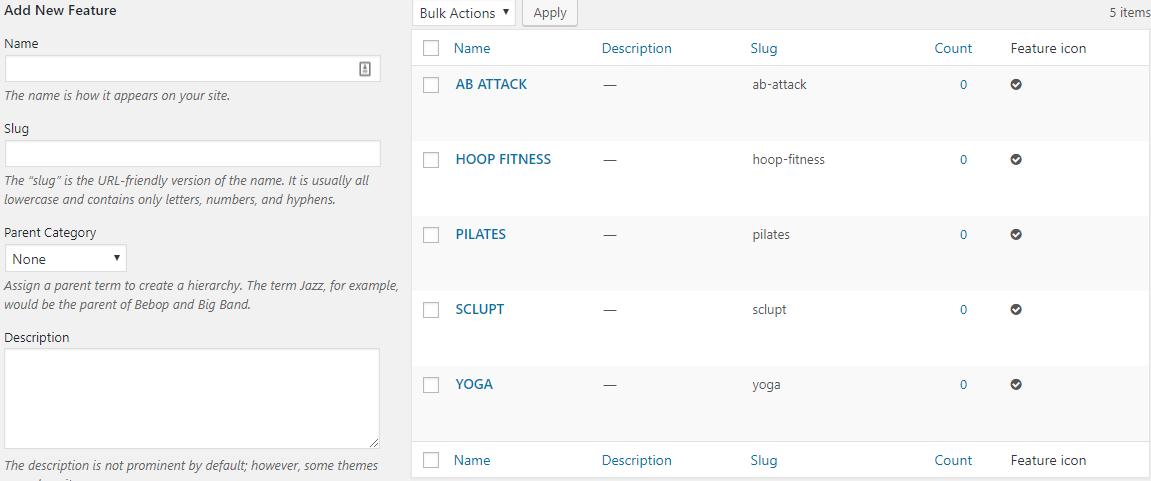
For the Icons, you tin first adding by using FontAwesome. Y'all tin follow the steps below:
Stride 1: Go to FontAwesome website
Step ii: Search by the Icon of your preference
Step 3: Scroll downwards the page and copy the code inside the form=
STEP 4: Insert in the called feature
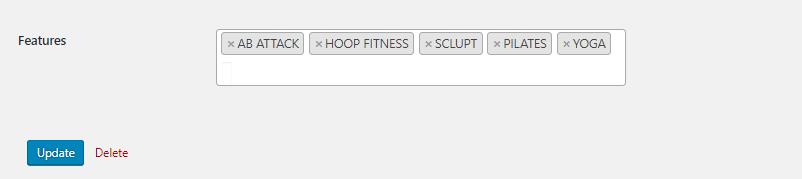
Now later this process, let'due south add the Features into the Gym Category.
Y'all can follow the steps as below:
Step 1: Return to Listings
STEP two: Select in the list Categories
STEP 3: Choose the Category and click Edit
Pace four: Add the features created in the box
Stride 5: Click on Salvage button
You can add together more than Additional Fields into your Categories. This way you can specify which Features are directly related to the Category and which may exist included for business just.
To start adding these fields, follow the steps below:
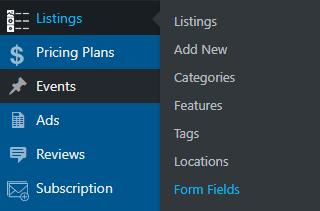
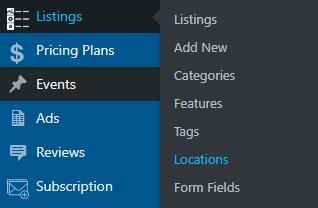
Pace ane: Go to Listings
Footstep ii: Select Form Fields in the list
Pace three: Add a New Field
Allow's start by creating an Additional Field to inform visitors that our Gym accepts some credit menu as payment.
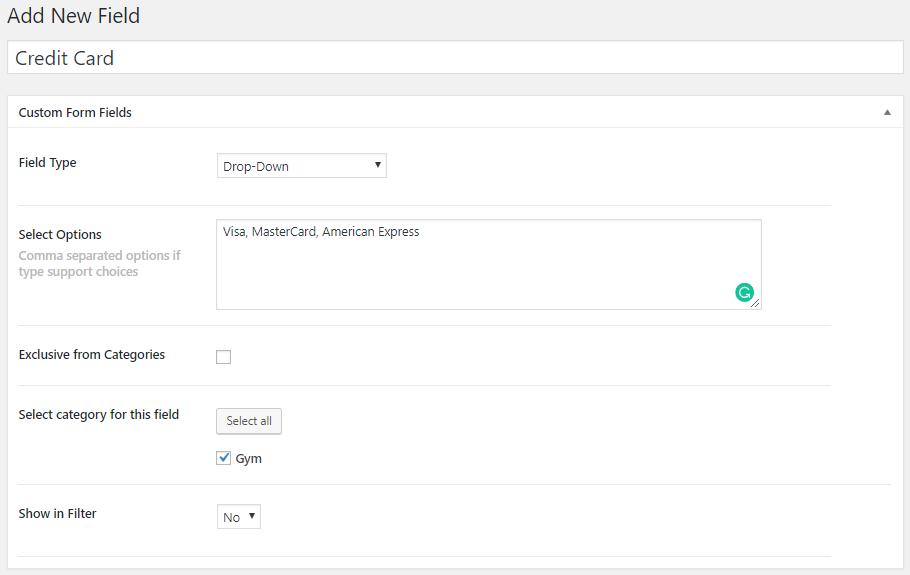
Y'all can configure the Field Blazon every bit your preference, eg: (Text, Drop-Down, Checkbox, etc). Also, if this boosted item is a standard option within your business niche, you tin also include it as exclusive to all others Categories.
Now with the Category and Features created, let's commencement by creating the locations for the Directory.
Kickoff of all, there are ii options available on how yous can configure your Directory Locations.
- Locations by Admin – With this option, you can add manually the locations of your preference within your country/state/city. This option is recommended for Directories that has the idea of serving services for locals.
- Auto-Locations past Google – With this selection, Google volition automatically identify users location while typing the business organization address on the submit listing page. All you have to exercise is specify whether Google volition piece of work as Worldwide or Countrywide.
Allow's dive into the step by step on how to configure the Locations:
Selection 1
STEP i: Get to Listings
STEP 2: Select Locations
Now, let's create a simple state category as an example. You can ascertain whether y'all want to include only cities or by multiple states with pre-defined regions based on your business organization purpose.
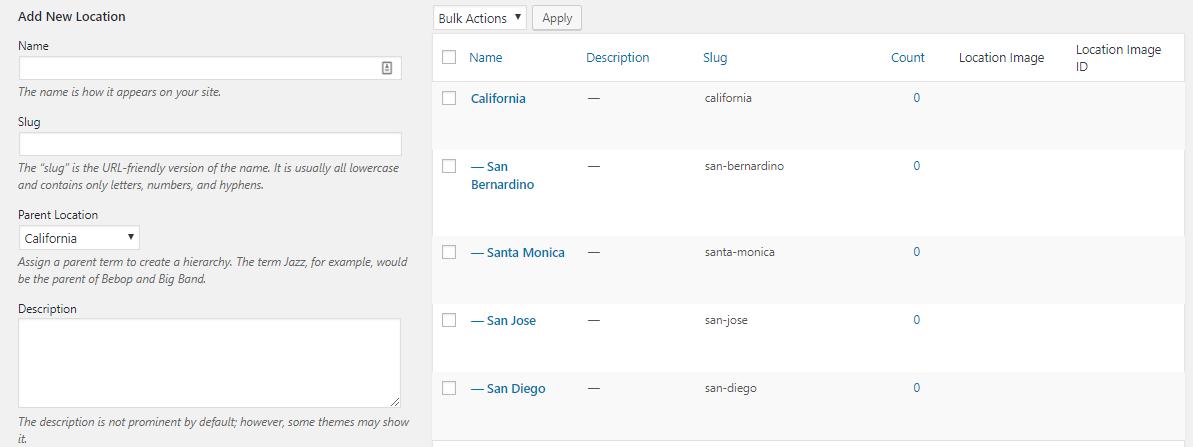
After including the Locations, you tin showtime adding some images that best describe the specific area. These images will be shown in case you want to include them on your Homepage Directory.
OPTION 2
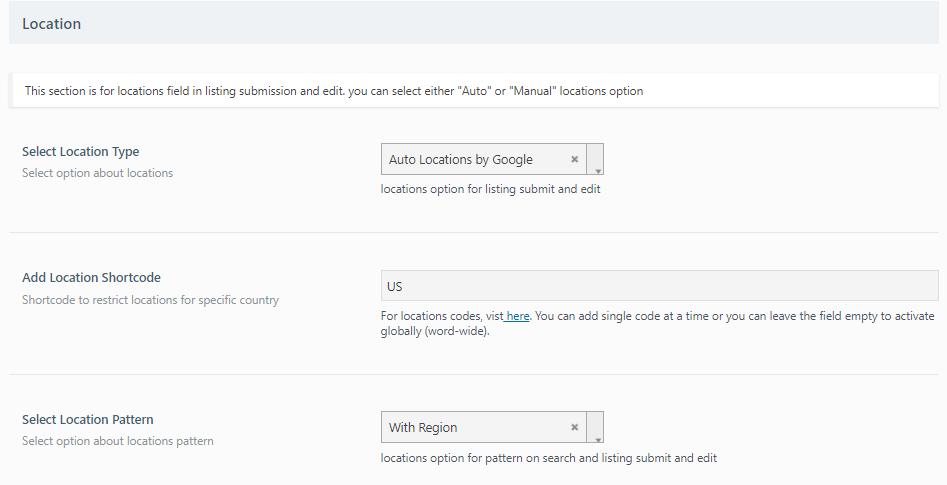
Footstep 1: Go to Theme Options
STEP 2: Go to Listing Settings
STEP three: Select Location in the list
This option will permit that every List added in the Directory, the Google Motorcar-Location volition identify user's typing while inbound their concern address in the Submit Listing Page.
Also, in that location's another setting identical to the to a higher place, which we should also apply to the Directory for visitors to exist able to get Listings based by their current Location.
In club to conclude this setting, follow the steps below:
STEP 1: Go to Theme Options
Stride 2: Select Search Settings
Stride 3: Scroll down the page until you observe the same option every bit the epitome below
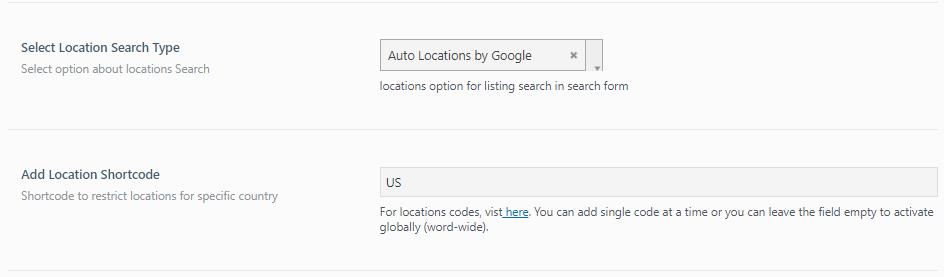
Now you can decide which option works best for your business purpose.
cordovateuttlying.blogspot.com
Source: https://docs.listingprowp.com/go/guide/
0 Response to "How to Upload Listingpro Theme to Wordpress"
Publicar un comentario